


Configuration Guide to Voice Mailbox
Release time:Jan 16, 2018
My colleague Xiaozhang asked me yesterday: “If I call someone on cell phone and he does not answer, I can send a text message to him as a reminder. But if I try to reach him on landline and there is no answer, how can I let him know that I called?” What a silly question! Why not leave a message? “But I don’t know how.” Xiaozhang replied. It is very easy. Let me show you.
Configuring a Voice Mailbox
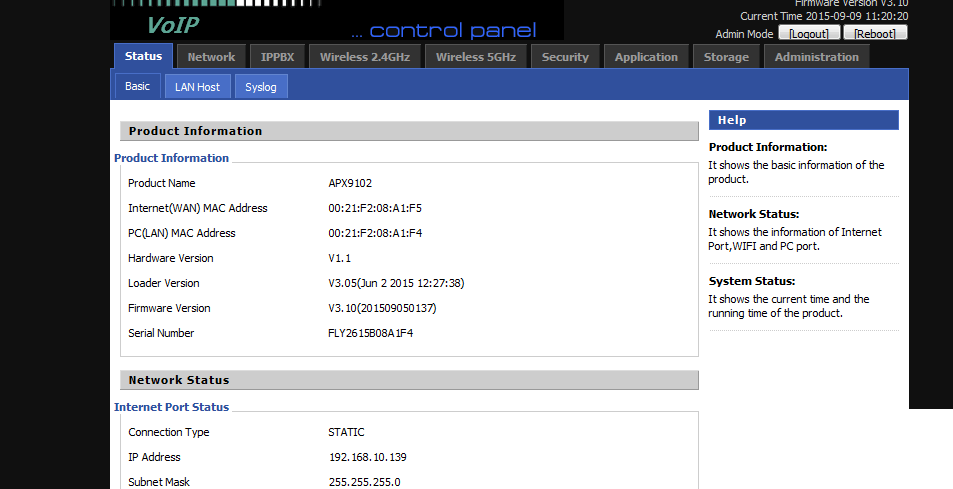
1. Open the APX9102 web configuration interface via an IP address; and enter the username and password for login, as shown in Figure 1 (the field with red mark is mandatory).
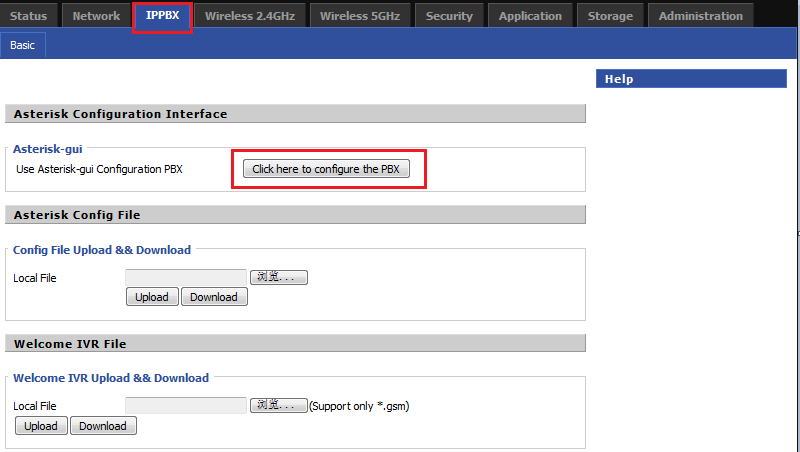
2. Click IPPBX and click click here to configure thePBX to access the PBX configuration interface, as shown in Figure 2.
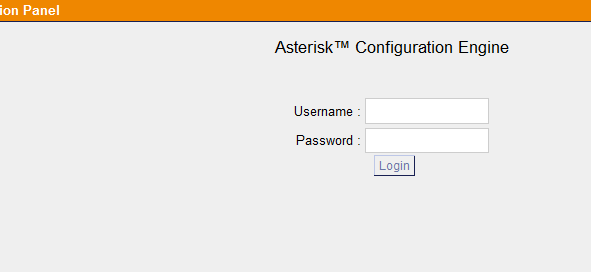
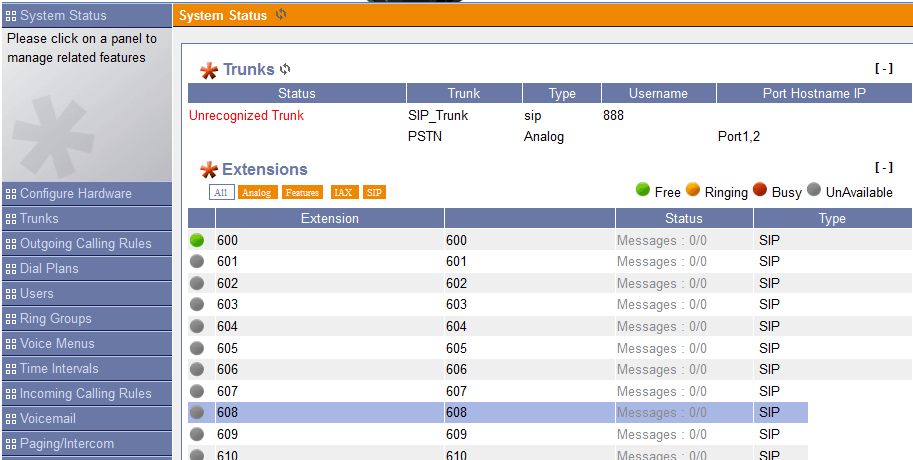
3. Enter the username and password (as shown in Figure 3) to access the configuration interface, as shown in Figure 4.

Configuring a Voice Mailbox
1. Open the APX9102 web configuration interface via an IP address; and enter the username and password for login, as shown in Figure 1 (the field with red mark is mandatory).
Figure 1
Figure 2
Figure 3
Figure 4
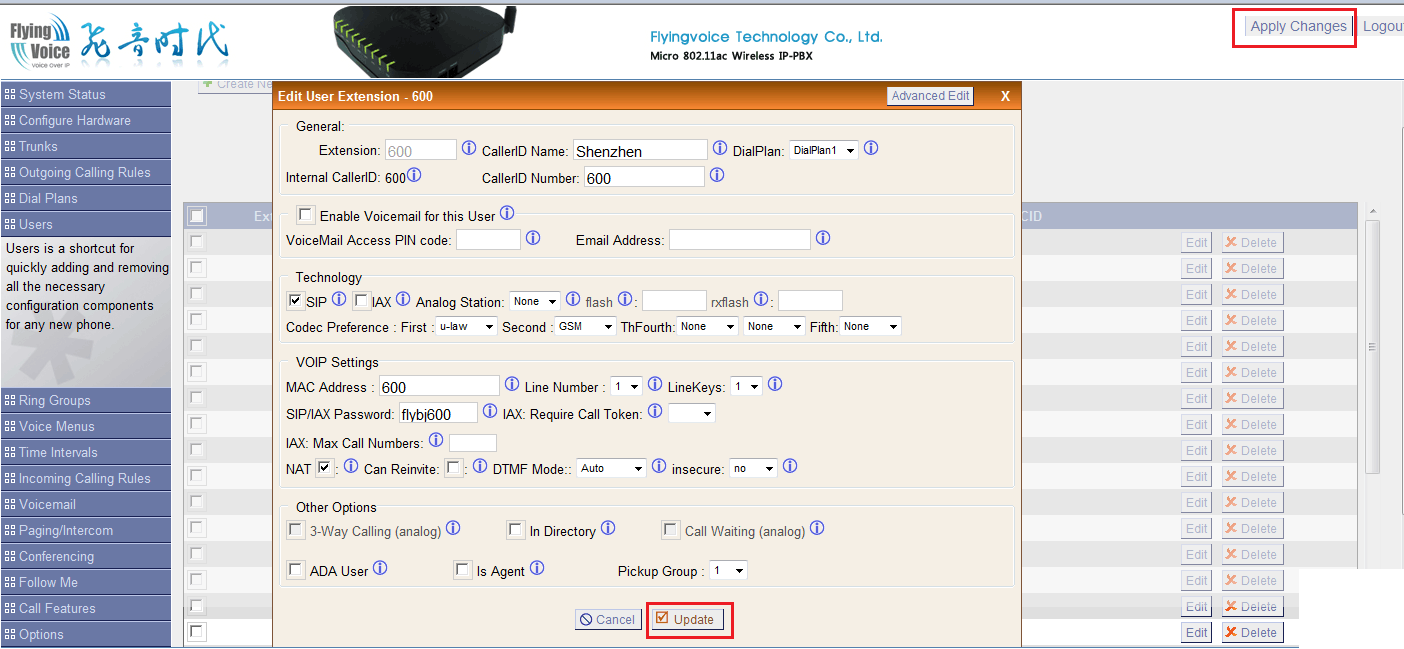
4. Click User, and find the extension number (such as 600) for which you want to configure the voicemail function, and click Edit to access the corresponding configuration interface, as shown in Figure 5.
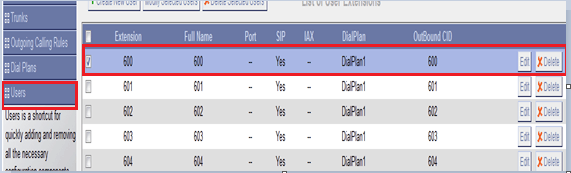
Figure 5
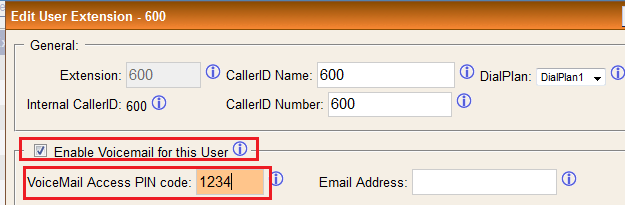
5. Tick Enable Voicemail for this User and set a password (such as 1234) for using the voice mailbox, as shown in Figure 6
Figure 6
6. Click Update to save the configuration. Make sure to click Apply Changes in the upper-right corner, as shown in Figure 7.
Figure 7
7. Click Voicemail on the configuration interface. On the interface that appears, click General Setting and check the number (for example, *97) set in Extension for checking message, as shown in Figure 8. This number is the feature code used to listen to voice messages. Press the number on the extension telephone, and you can listen to voice messages.
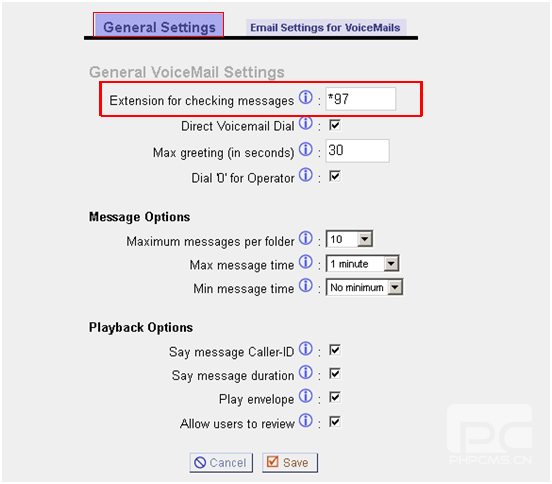
Figure 8
Parameters for voicemail:
1) Extension for checking messages: Set an extension number to check voice messages. The user can dial this number to access the voice mailbox.
2) Direct Voicemail Dial: Tick this option, and the user can dial #+extension number to directly leave a message.
3) Max greeting: Set the time duration of a greeting message.
4) Dial ‘0’ for Operator: Tick this option, and the user can directly exit the voice mailbox by pressing 0 and connect to an operator. Configure Operator on the Options panel.
5) Maximum messages per folder: indicate the maximum number of messages in a folder. Extra messages cannot be saved and are invalid. Users are advised to clear read messages periodically;
6) Max message time: indicate the maximum time duration of a voice message. When time is up, the system stops recording the message and asks the user about the next operation based on the dial plan.
7) Min message time: indicate the minimum time duration of a voice message. If the user stops recording a message within this time, the message will not be transmitted to the target extension number.
8) Say message Call-ID: Tick this option, and the system plays the message leaver's ID before playing a message.
9) Say message duration: Tick this option, and the system plays the time duration of a message before playing the message.
10) Play envelope: Tick this option, and the system plays the generation time of a message before playing the message.
11) Allow users to review: Tick this option, and Apx9122 asks the user whether to record another message or save the current message after the user leaves a message and presses #.
Configuring the Extension Phone (for IP542N Phone)
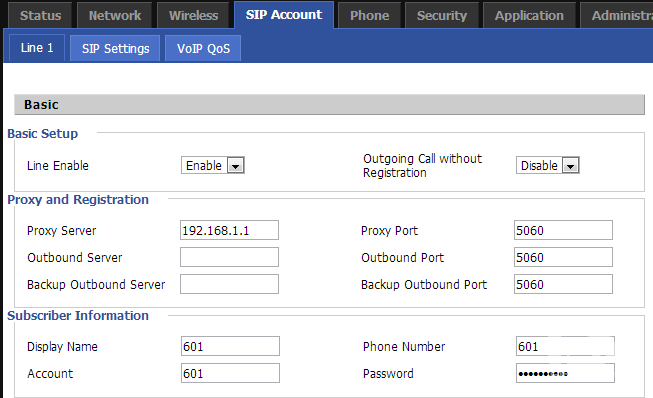
1. Access the web configuration interface via an IP address, and enter the username and password for login. Click SIP Account and select a line (for example, line 1) to enable voicemail, as shown in Figure 9. Make sure this line has been registered with the PBX, Enable Voicemail for this User has been ticked, and a password to access the mailbox has been set.

Figure 9
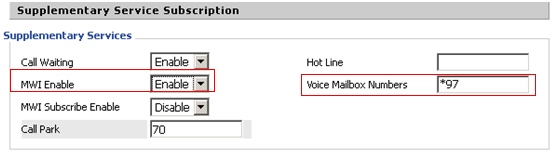
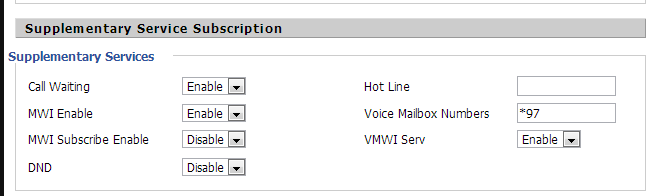
2. Click Supplementary Services and set MWI Enable to Enable and Voice Mailbox Number to *97, as shown in Figure 10.
Figure 10
3. Click Save. It is better to restart the system after the configuration.
Configuring a Voice Gateway (for G801)
Register the extension phone connected to G801 with the PBX and restart the system after registration. Make sure to tick Enable Voicemail for this User to enable voicemail for this phone and set a password to access the voice mailbox, as shown in figures 11 and 12.
Figure 11
Figure 12
Leaving and Checking Messages
After the preceding configuration, the user can leave and check a message.
1. Leaving a message
If the user does not answer a call or the line is busy, the system will ask the caller whether to leave a message: “The number you dialed is not answered. You can leave a message after hearing a beep.” Speak to the microphone and hang up the phone or press #.
2. Checking a message
For an IP542N phone, if the user receives a message, the indicator in the upper-right corner of the phone is always on.
In this case, you have check the message by either of the following:
Method 1: Press the button  , select a line, and click select. Follow the prompt to check the message.
, select a line, and click select. Follow the prompt to check the message.
Method 2: If the message is received via a gateway, the analog phone connected to the gateway will ring twice. Press *97, follow the prompt to enter the password, and press 1 to check the message.
That's all about voice messages. Come on and have a try now.
 Back to list


