


-
By product category
-
Search by product
- SR3000-5G
- SR3000-5G-Ruggedized
- SR3000
- SR3000-lite
- T5100
- PR12
- T5300
- FWR7302
- FWR9601
- FWR8102
- PR08
- LM150
- G504
- G508
- FTA1101
- FTA5102E2
- FGW4148-16S/24S/32S/48S
- FIP16
- FIP15G
- FTA5101
- FWR9502
- FWR8101
- FWR7102
- P23G
- P23GW
- P22G
- P22P
- P21/P21P
- P20/P20P/P20G
- P11W
- P10W
- P11/P11P/P11G
- P10/P10P/P10G
- FIP16Plus
- FIP15G Plus
- FIP14G
- FIP12WP-R
- FIP13G
- FIP12WP/ FIP12WP Home
- FIP11C/FIP11CP
- FIP10/FIP10P
- P11LTE
- P10LTE
- i12/i12V
- i11/i11V
- P2EXP
- i86V-01/02
- PB01
- i86-01/02/03
- FTA5111
- HB01 & USB433
- FTA5120
- HP200
- BT50
- EHS10
- FPX9102H
- SW7R-Pro
- FRPS
- FACS
- FDC
-
Find by question type
Introduction
The Paging and Intercom features are widely used in a variety of businesses. The called parties do not need to pick up the handset as the real-time voice messages will be played via the phone speakers, allowing them a faster response or action.
Let’s see how to set it up with Yeastar P550 PBX and Flyingvoice Phones.
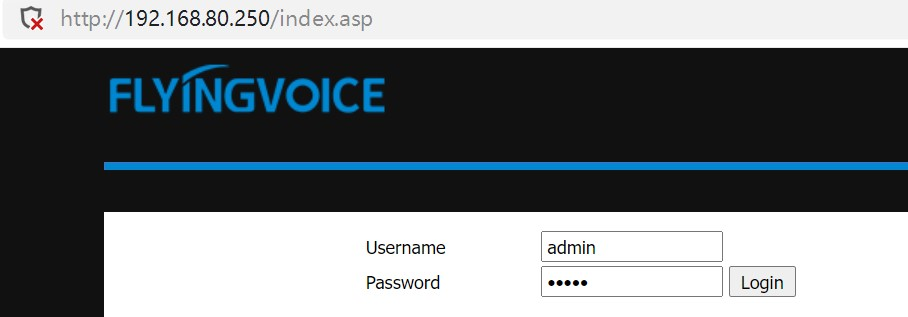
Step 1.Login to the IP Phone management page
Open a browser and type in the IP Phone address in the address bar, a login page displays as below, both the default username and password are admin. Then click Login.
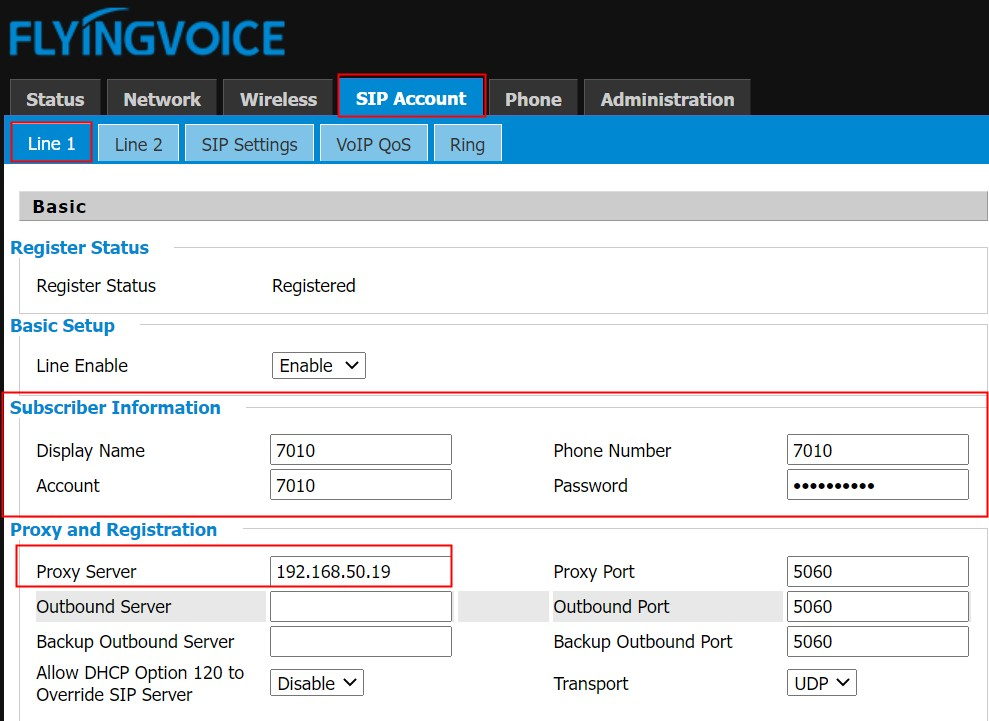
Step 2.Configure the sip account
Go to SIP Account > Line 1, enable the option Port Enable, enter the Proxy Server, Proxy Port, Display Name, Phone Number, Account and Password, then click on Save&Apply on the bottom of the page.
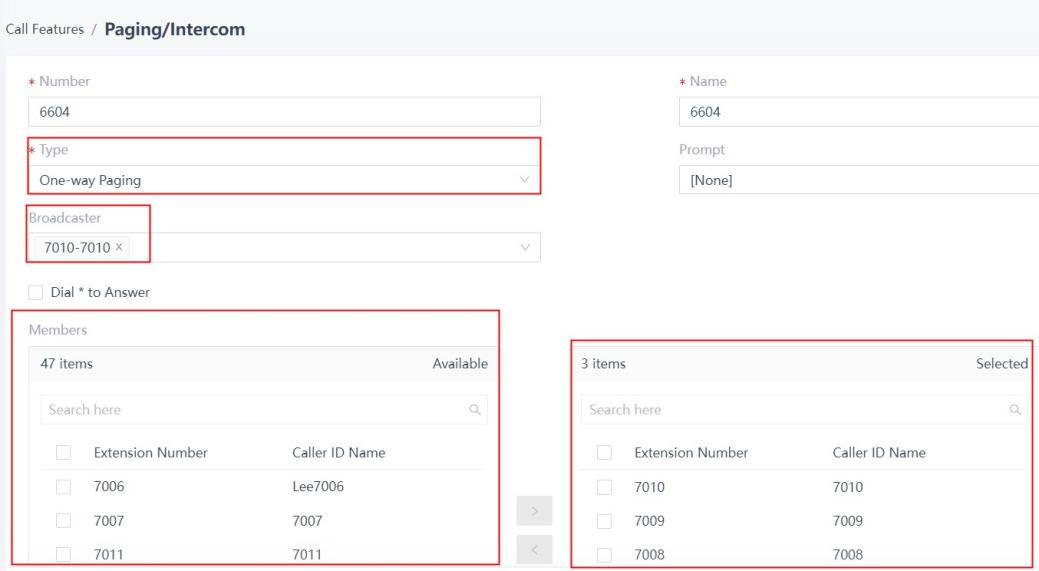
Step 3.Configure the Yeastar P550
Go to Call Features > Paging/Intercom, click  enter the below page, Paging Function:Type choose One-Way Paging; Intercom Function:Type choose Two-way Intercom. Broadcaster choose the IP Phone you want it to be the broadcaster. Members choose the members > Selected. Then click on Save on the bottom of the page.
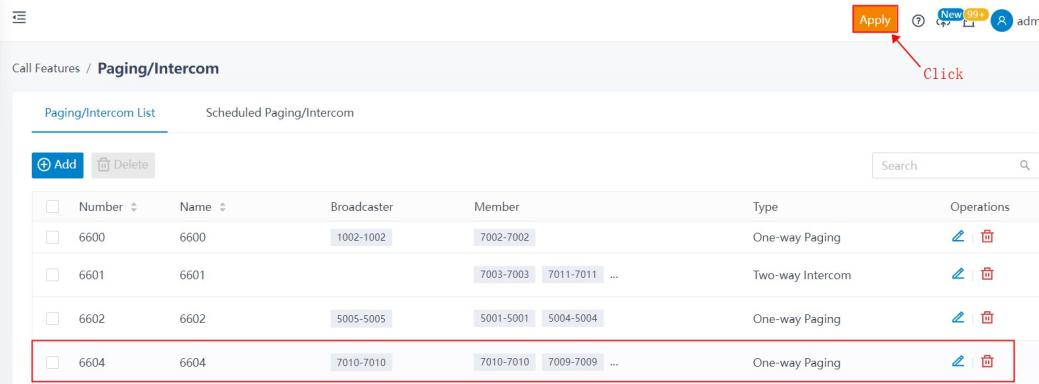
Then enter the below page, click the Apply bottom to apply the configuration.
Step 4.Configure the IP phone
Method 1: Go to Phone > Line Key, Type choose Paging, Value enter the Number on Yeaster, enter the Label, then click on Save button.
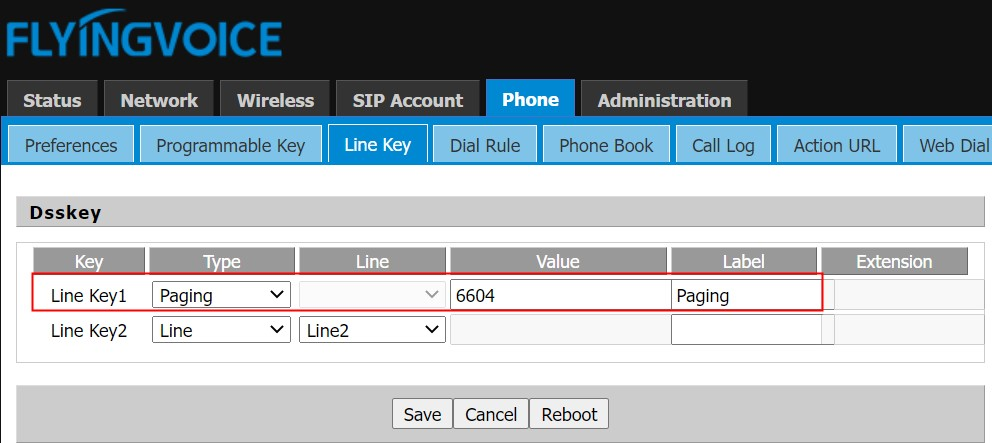
Then press the Line key1 to call other extensions in the same paging group.
Method 2: Go to Phone > Programmable Key, Type choose Paging, Value enter the Number on Yeaster, enter the Label, then click on Save button on the bottom of the page.
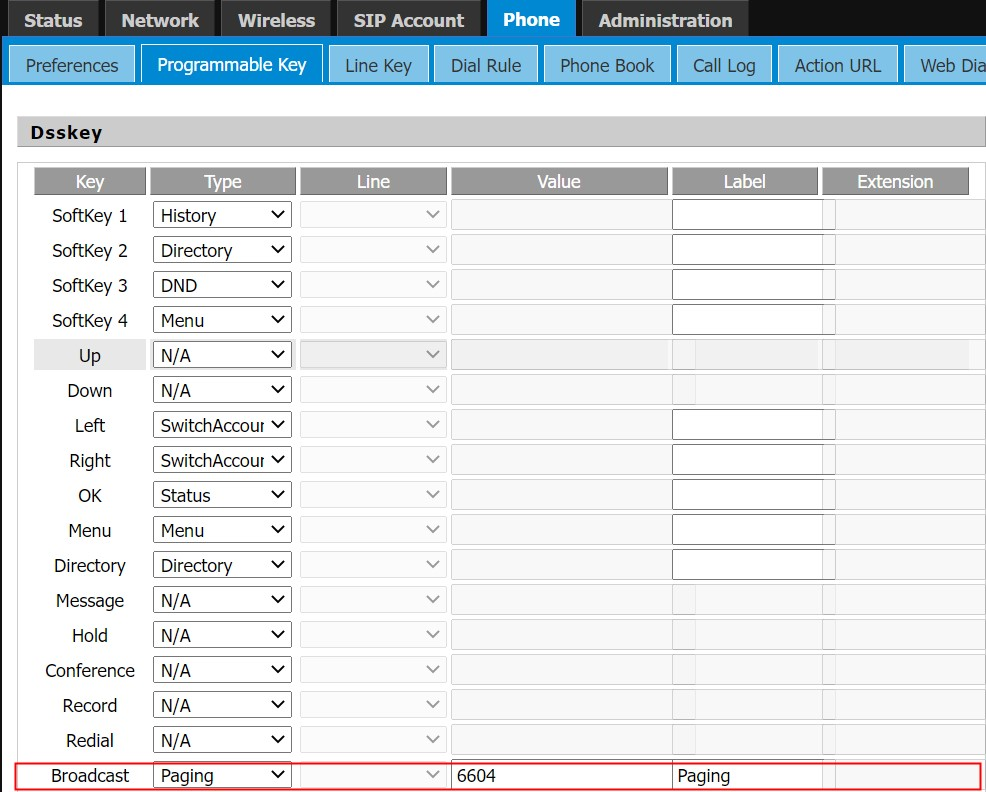
Then press the Paging Key on the keyboard to call other extensions in the same paging group.
When you choose Type: Two-way Intercom on Yeastar P550 to achieve the Intercom function, please configure like the below page:
Go to Phone > Line Key, Type choose Paging, Line choose Line1, Value enter the Number on Yeaster, enter the Label, then click on Save button on the bottom of the page.
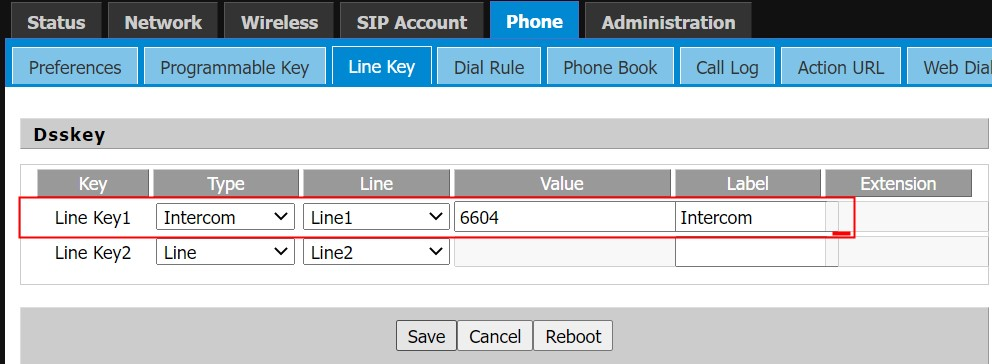
Then press the Line key1 to call other extensions in the same paging group.
 Back to list


