-
By product category
-
Search by product
- Mini-ESBC
- SR3000-5G
- SR3000-5G-Ruggedized
- SR3000
- SR3000-lite
- T5100
- PR12
- T5300
- FWR7302
- FWR9601
- FWR8102
- LM150
- G504
- G508
- FTA1101
- FTA5102E2
- FGW4148-16S/24S/32S/48S
- FIP16
- FIP15G
- FTA5101
- FWR9502
- FWR8101
- FWR7102
- P23G
- P23GW
- P22G
- P22P
- P21/P21P
- P20/P20P/P20G
- P11W
- P10W
- P11/P11P/P11G
- P10/P10P/P10G
- FIP16Plus
- FIP15G Plus
- FIP14G
- FIP12WP-R
- FIP13G
- FIP12WP/ FIP12WP Home
- FIP11C/FIP11CP
- FIP10/FIP10P
- P11LTE
- P10LTE
- i12/i12V
- i11/i11V
- P2EXP
- i86V-01/02
- PB01
- i86-01/02/03
- FTA5111
- HB01 & USB433
- FTA5120
- HP200
- BT50
- EHS10
- FPX9102H
- PR08-Pro
- P11S
- P10S
- SW7R-Pro
- FRPS
- FACS
- FDC
-
Find by question type
Step1. Login to the adapter’s management page
1.1 You can press the OK key to view Network and phone status. The phone screen is shown below:

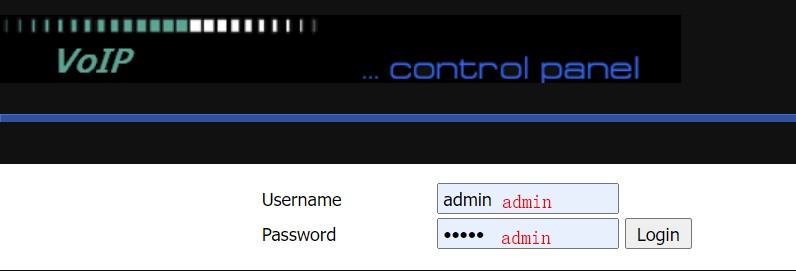
1.2 Open a browser and type in the IP phone address 192.168.80.145 in the address bar, a login page displays as below, both the default username and password are admin. Then click Login.

1.3 Go to Administration > Management, Enable Remote Telnet, then click Save & Apply.

Step2. Export the page via TFTP
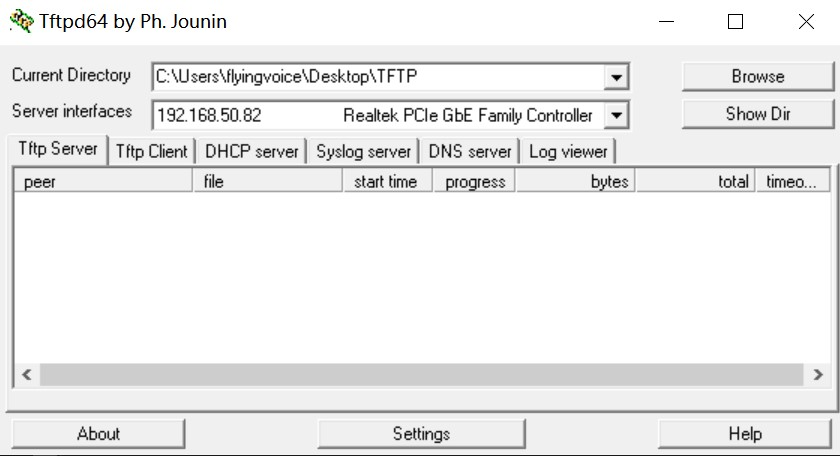
2.1 Open the TFTP folder, double-click the tftpd64.exe, Server interfaces choose PC’s IP address like the shown picture:

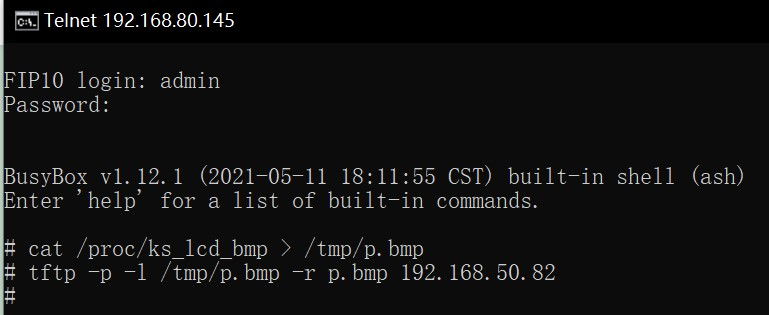
2.2 Press win+r key, input cmd to open the command window, telnet to the phone with its IP address, input telnet x.x.x.x(IP Phone address), press the enter button go to the below page, enter the login username and password, they are admin by default, press the enter button.

2.3 Run the command below (192.168.50.82 is the PC’s IP address).
cat /proc/ks_lcd_bmp > /tmp/p.bmp
tftp -p -l /tmp/p.bmp -r p.bmp 192.168.50.82

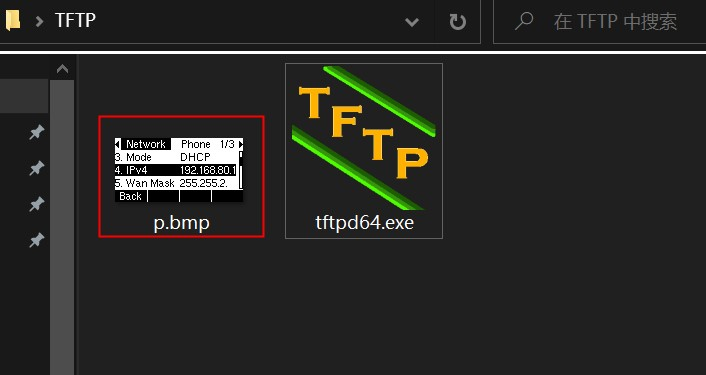
2.4 After that the photo will export to the FTTP folder, if you want to export another photo, please put the picture(p.bmp) into another folder to avoid the newly imported picture overwriting this picture.


 Back to list


