


-
By product category
-
Search by product
- PR18
- P11U
- P10U
- P11S
- P10S
- Mini-ESBC
- SR3000-5G
- SR3000-5G-Ruggedized
- SR3000
- SR3000-lite
- T5100
- PR12
- T5300
- FWR7302
- FWR9601
- FWR8102
- LM150
- G504
- G508
- FTA1101
- FTA5102E2
- FGW4148-16S/24S/32S/48S
- FIP16
- FIP15G
- FTA5101
- FWR9502
- FWR8101
- FWR7102
- P23G
- P23GW
- P22G
- P22P
- P21/P21P
- P20/P20P/P20G
- P11W
- P10W
- P11/P11P/P11G
- P10/P10P/P10G
- FIP16Plus
- FIP15G Plus
- FIP14G
- FIP12WP-R
- FIP13G
- FIP12WP/ FIP12WP Home
- FIP11C/FIP11CP
- FIP10/FIP10P
- P11LTE
- P10LTE
- i12/i12V
- i11/i11V
- P2EXP
- i86V-01/02
- PB01
- i86-01/02/03
- FTA5111
- HB01 & USB433
- FTA5120
- HP200
- BT50
- EHS10
- FPX9102H
- PR08-Pro
- SW7R-Pro
- FRPS
- FACS
- FDC
-
Find by question type
This Article Applies to FIP10, FIP10P, FIP11C, FIP11CP, FIP13G, FIP14G, FIP15G, FIP16
On the VOIP phone, the account(extension number) is like the SIM card on the mobile phone. Register an account makes it easier for the phones to receive an incoming call or dial an outgoing call. This article will explain how to register an account on the FIP1X series phone.
Step 1. Network connection
FIP1X series phone support wired and wireless connection.

When using the wireless connection, please refer to the instruction below.
1) Navigate to Menu -> Basic->Wi-Fi.
2) Turn on Wi-Fi, highlight Available Network(s).
3) Select a wireless network and connect to it, then press OK.
When using the wired connection, please refer to the instruction below.
Connect the router or switch to the phone’s Internet port ![]() with an Ethernet cable.
with an Ethernet cable.
Note: If the phone failed to obtain an IP address, refer to the Appendix to configure the IP address manually.
Step 2. Account registration
There are two ways to register the account on the phone.
Method 1. via the phone’s management page
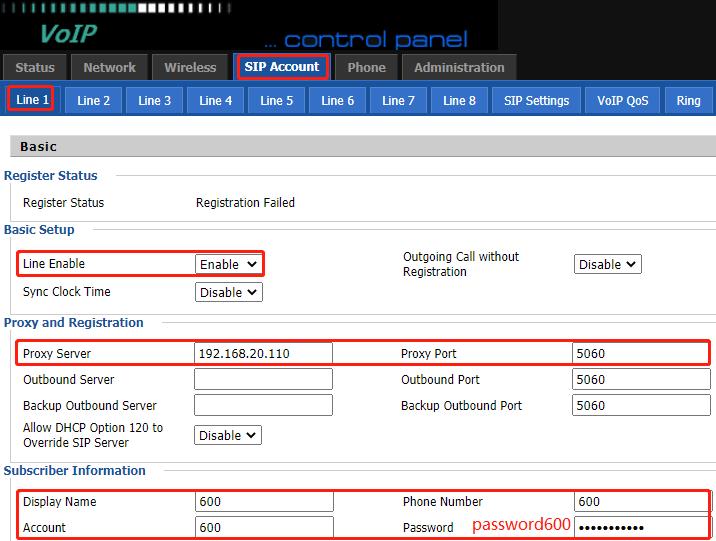
Note: Before configuration, the PBX server administrator should provide the following registration information: server’s domain name or IP address (such as 192.168.20.110), port number (5060), account number (600), account password (password600).
1) Check the phone’s IP address
Press the OK Key ![]() to check the phone’s IP address.
to check the phone’s IP address.
Note: For FIP16, press the OK key, then go to Status to check the IP address.

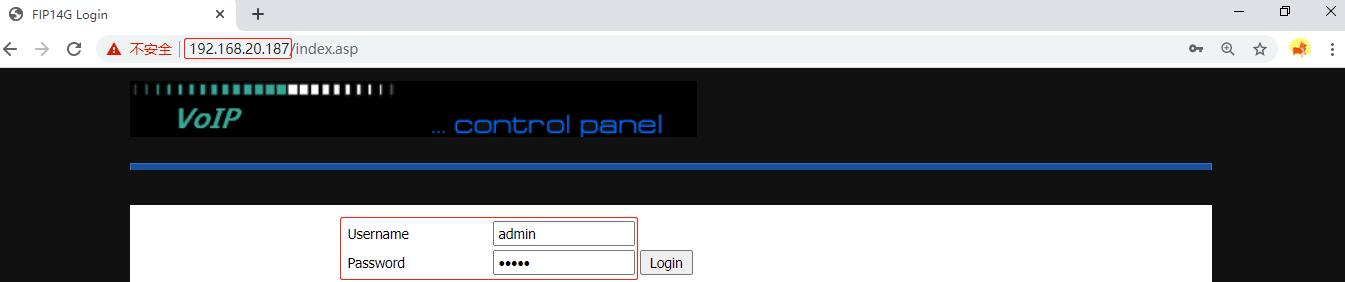
2) Log in to the phone’s management page.
Type in the phone’s IP address in the address bar of the web browser, then enter the login username and password to log in( the default username and password are ‘admin’).
3) Enter the registration information.
Click SIP Account->Line1, enable the Line, enter the Proxy Server, Proxy port, Display Name, Phone Number, Account and Password, then click Save&Apply.
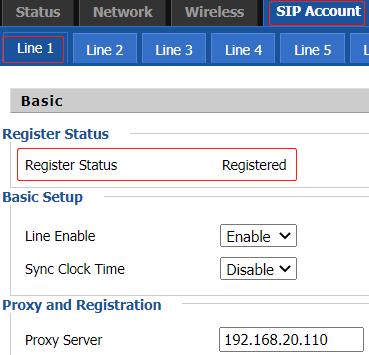
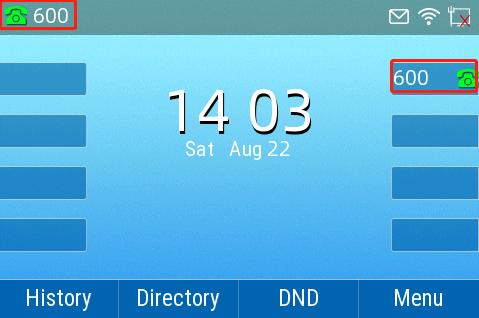
Wait for a moment, the phone will be registered successfully, you will see the Register Status changes to Registered, the LCD screen displays the extension number and a green phone icon, the Line Key lights up green.
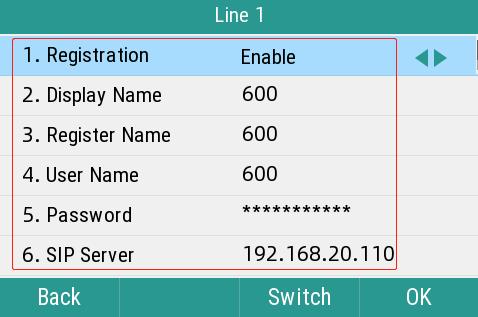
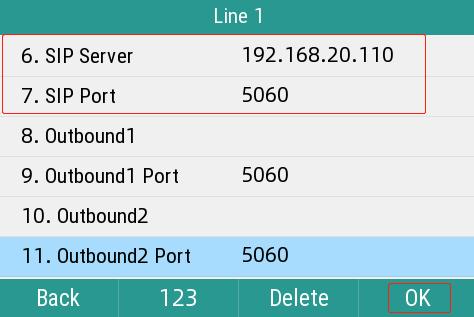
Method 2. via the phone’s LCD screen
Navigate to Menu ->Advanced(default password is admin)->Accounts->Line 1, enable the Registration, enter the Display Name, Register Name, User Name, Password, SIP Server(server’s domain name or IP address), and SIP Port, then press OK.
Appendix
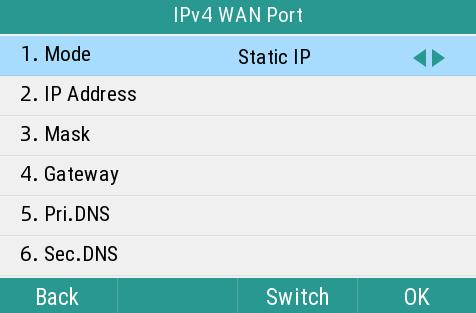
Configure a static IP address on the phone’s LCD screen
Navigate to Menu ->Advanced(default password is admin)->Network->WAN Port->IPv4, change the Mode to Static IP, enter the IP address, Mask, Gateway, Primary DNS and Secondary DNS, then press OK.
 Back to list


