


-
By product category
-
Search by product
- P11U
- P10U
- P11S
- P10S
- Mini-ESBC
- SR3000-5G
- SR3000-5G-Ruggedized
- SR3000
- SR3000-lite
- T5100
- PR12
- T5300
- FWR7302
- FWR9601
- FWR8102
- LM150
- G504
- G508
- FTA1101
- FTA5102E2
- FGW4148-16S/24S/32S/48S
- FIP16
- FIP15G
- FTA5101
- FWR9502
- FWR8101
- FWR7102
- P23G
- P23GW
- P22G
- P22P
- P21/P21P
- P20/P20P/P20G
- P11W
- P10W
- P11/P11P/P11G
- P10/P10P/P10G
- FIP16Plus
- FIP15G Plus
- FIP14G
- FIP12WP-R
- FIP13G
- FIP12WP/ FIP12WP Home
- FIP11C/FIP11CP
- FIP10/FIP10P
- P11LTE
- P10LTE
- i12/i12V
- i11/i11V
- P2EXP
- i86V-01/02
- PB01
- i86-01/02/03
- FTA5111
- HB01 & USB433
- FTA5120
- HP200
- BT50
- EHS10
- FPX9102H
- PR08-Pro
- SW7R-Pro
- FRPS
- FACS
- FDC
-
Find by question type
Flyingvoice VOIP router is different from traditional routers. It is a comprehensive VOIP wireless router that integrates the FXS interface, SFP Interface, 4G-LTE module, etc. on the basis of traditional NAT router functions. This article mainly introduces how to configure the router to access the Internet and register to the SIP server.
This Article Applies to FWR8102, FWR9601, FWR7102, FWR7302
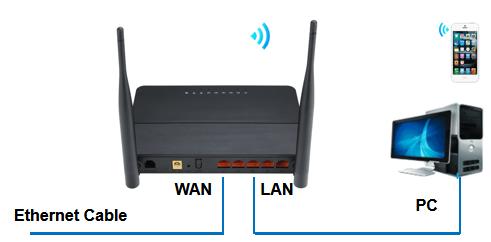
Step 1. Physical connection
If you use the Ethernet cable to get internet, connect the Ethernet cable to the router’s WAN port, and connect one of the router’s LAN ports to a computer.
|
|
|
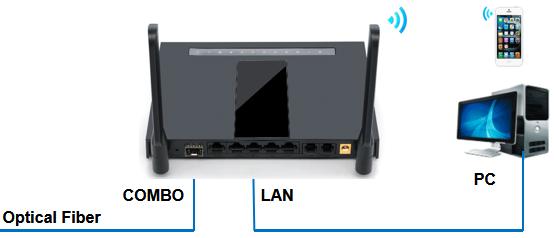
If you use a SIM card to get internet, insert the SIM card into the router, and connect one of the router’s LAN ports to a computer.
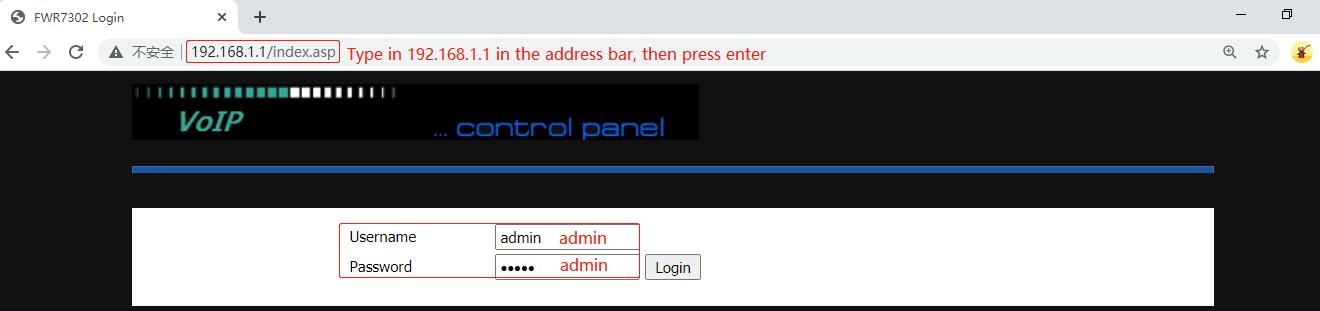
Step 2. Login to the router’s management page
Open a browser and type in the router’s LAN IP address 192.168.1.1 in the address bar, a login page displays as below, both the default username and password are admin.
Step 3. Configure the WAN Connection
Go to Status >Basic >Ethernet WAN Port Status to check the WAN IP address. When there is a WAN IP address, that means the router is working.

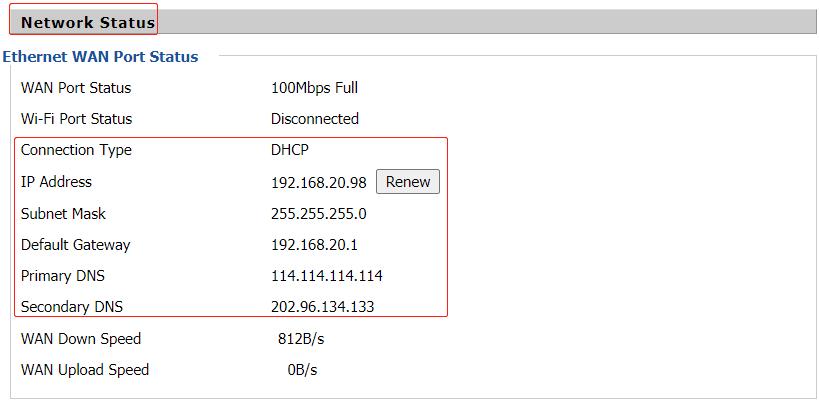
Note: If you use a SIM card to get internet, check LTE Status on this page, when there is an IP address under LTE status, that means the router is working.
Step 4. Customize the Wireless settings
Go to Wireless 2.4GHz or Wireless 5GHz > Basic to change the router’s SSID(wireless network name).
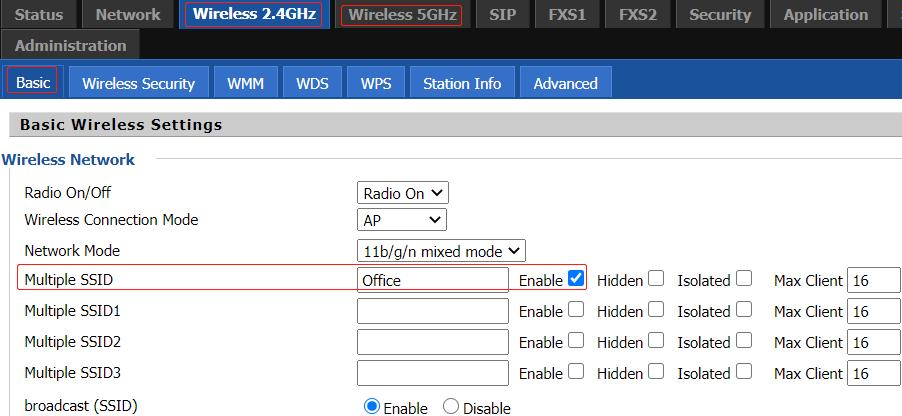
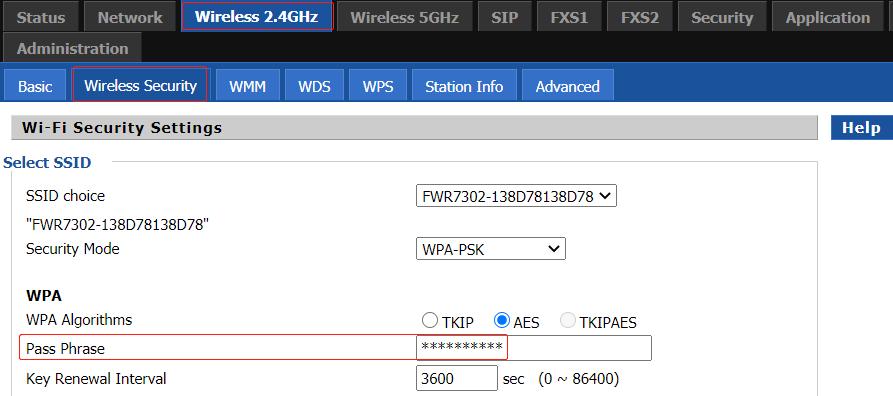
Go to Wireless 2.4GHz or Wireless 5GHz > Wireless Phrase to change the wireless password.
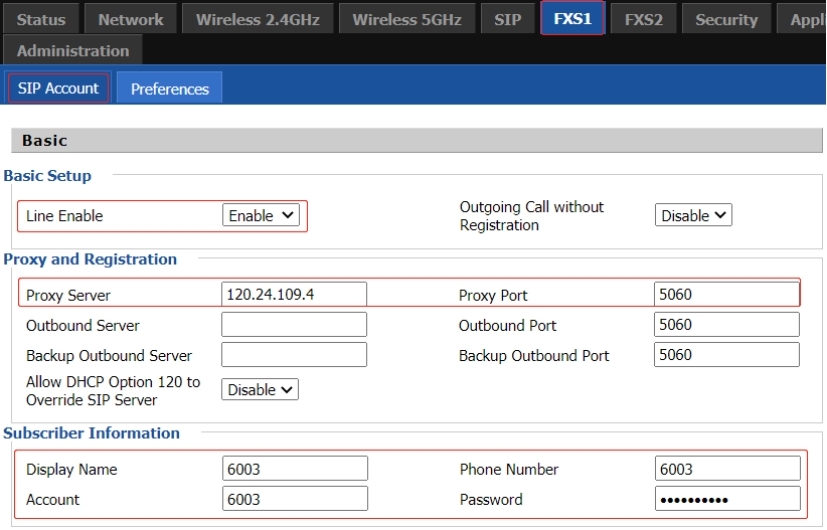
Step 5. Register to the PBX server
Connect the analog phone to the router’s Phone 1 or Phone 2 port, go to FXS1 or FXS2 > SIP Account, enable the ‘Line Enable’, enter the Proxy Server, Proxy Port, Display Name, Phone Number, Account and Password, then click on Save&Apply on the bottom of the page.
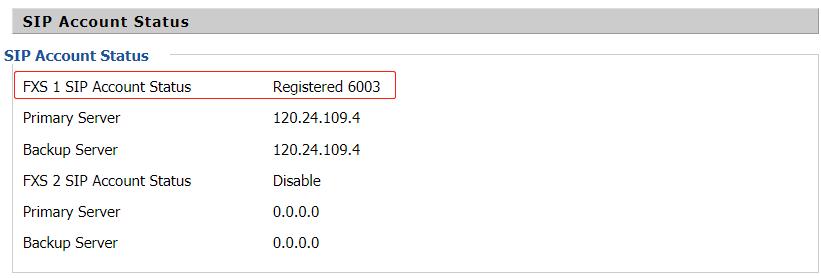
When register to the PBX server successfully, the router’s Phone LED indicator will light up, and the SIP Account Status shows Registered. The analog phone can make outgoing calls or receive incoming calls.

|
 Back to list


