


-
By product category
-
Search by product
- SR3000-5G
- SR3000-5G-Ruggedized
- SR3000
- SR3000-lite
- T5100
- PR12
- T5300
- FWR7302
- FWR9601
- FWR8102
- PR08
- LM150
- G504
- G508
- FTA1101
- FTA5102E2
- FGW4148-16S/24S/32S/48S
- FIP16
- FIP15G
- FTA5101
- FWR9502
- FWR8101
- FWR7102
- P23G
- P23GW
- P22G
- P22P
- P21/P21P
- P20/P20P/P20G
- P11W
- P10W
- P11/P11P/P11G
- P10/P10P/P10G
- FIP16Plus
- FIP15G Plus
- FIP14G
- FIP12WP-R
- FIP13G
- FIP12WP/ FIP12WP Home
- FIP11C/FIP11CP
- FIP10/FIP10P
- P11LTE
- P10LTE
- i12/i12V
- i11/i11V
- P2EXP
- i86V-01/02
- PB01
- i86-01/02/03
- FTA5111
- HB01 & USB433
- FTA5120
- HP200
- BT50
- EHS10
- FPX9102H
- SW7R-Pro
- FRPS
- FACS
- FDC
-
Find by question type
FWR9102H can be used as a PBX server, this article describes how to configure SIP account on the FRW9102H router.
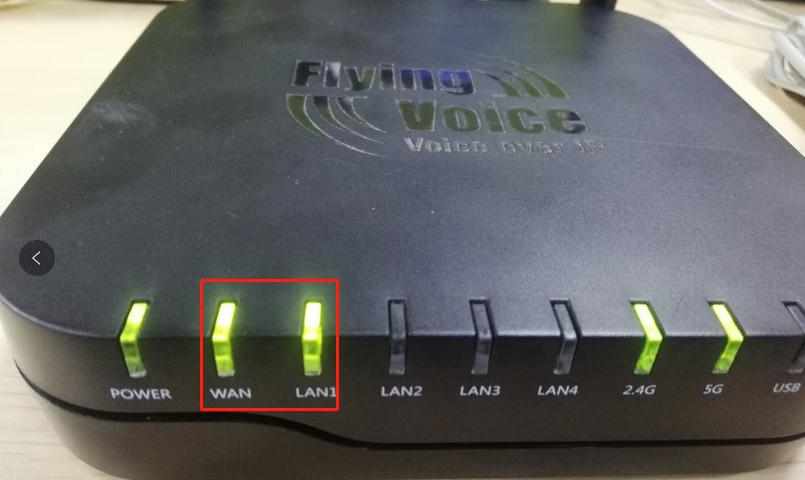
Step 1. Physical connection
Connect the router’s WAN port to the modem, connect one of the LAN ports to a computer. The router will assign an IP address(192.168.15.X) to the computer, both the WAN and LAN LED indicators blinking green, which means the router is working properly.
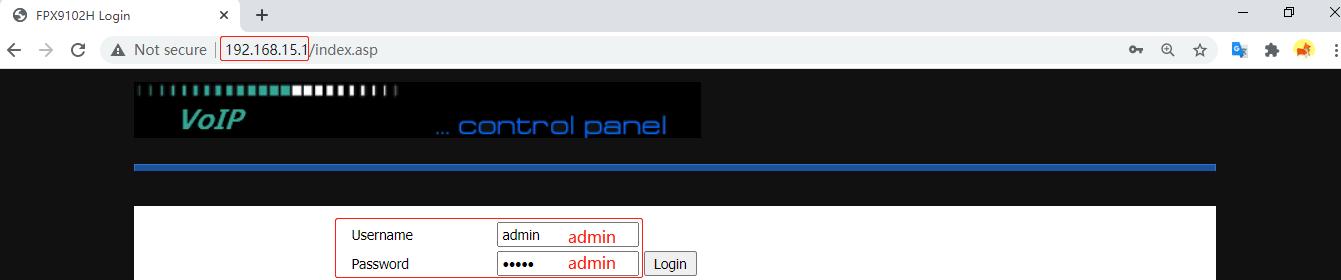
Step 2. Login to the router’s management page
Open a browser and type in the router’s LAN IP address 192.168.15.1 in the address bar, a login page displays as below, both the username and password are admin.
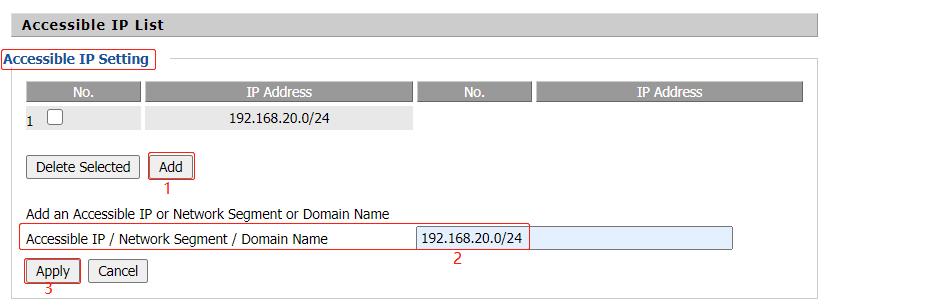
Step 3. Configure Accessible IP Setting
Go to IPPBX->Basic->Accessible IP Setting, click on Add, enter an allowed IP address or Network Segment, click on Apply.

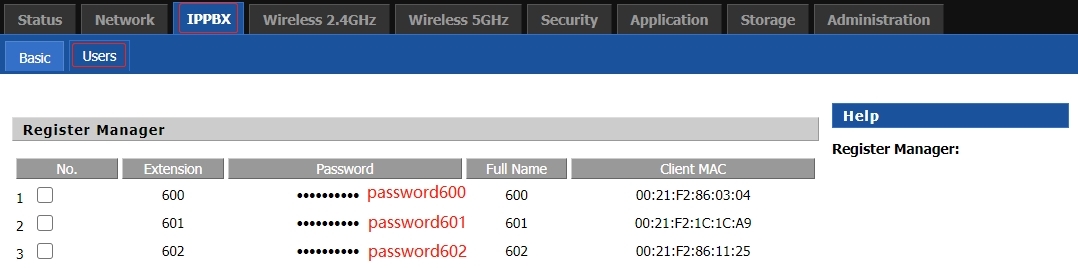
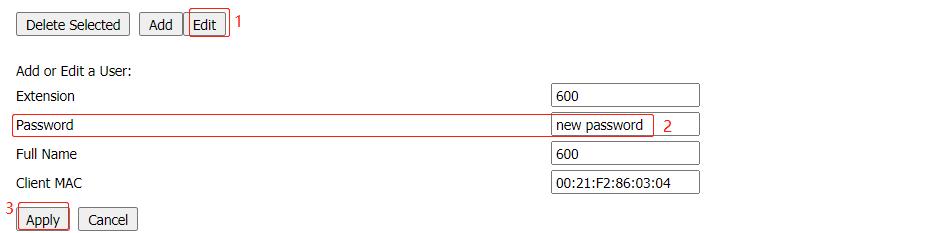
Step 4. Configure the Extensions
The router supports 50 extensions, range from 600-649, the default password is password+extension number. For example, the password for extension 600 is password600. Customize the User Extensions according to your needs.
To change the extension password, go to Users, select an extension, click on Edit, type in the new password, click on Apply.
Step 5. Reboot
Restart the router to apply the settings.
Appendix
Make an outbound call
To make an outbound call, connect the phone line from the telecom operator to the router’s Phone port. Dial 9 followed by the phone number. You can customize the settings according to your needs.

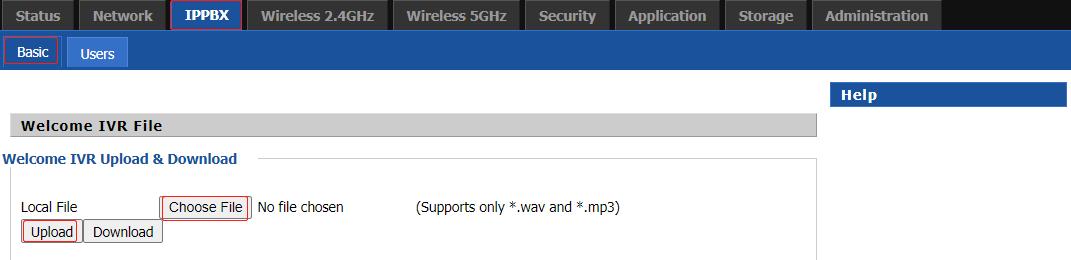
The Welcome IVR can be customized, go to IPPBX->Baisc->Welcome IVR File, click Choose File and Upload to upload your IVR. The file supports only *.wav and *.mp3.
Auto provision
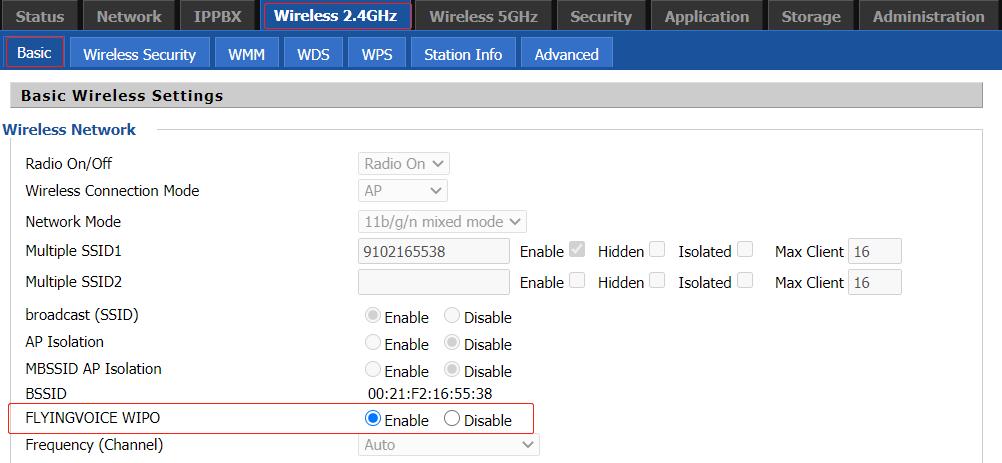
The router supports automatic discovery and zero-configuration for the Flyingvoice phone, once the Flyingvoice phone connected to the router’s network, no matter wireless network or wired network, the phone will get registered to the server automatically.
Note: this feature is enabled by default, you can go to Wireless 2.4GHz->Basic->FLYINGVOICE WIPO to disable it.
 Back to list


