


-
By product category
-
Search by product
- SR3000-5G
- SR3000-5G-Ruggedized
- SR3000
- SR3000-lite
- T5100
- PR12
- T5300
- FWR7302
- FWR9601
- FWR8102
- PR08
- LM150
- G504
- G508
- FTA1101
- FTA5102E2
- FGW4148-16S/24S/32S/48S
- FIP16
- FIP15G
- FTA5101
- FWR9502
- FWR8101
- FWR7102
- P23G
- P23GW
- P22G
- P22P
- P21/P21P
- P20/P20P/P20G
- P11W
- P10W
- P11/P11P/P11G
- P10/P10P/P10G
- FIP16Plus
- FIP15G Plus
- FIP14G
- FIP12WP-R
- FIP13G
- FIP12WP/ FIP12WP Home
- FIP11C/FIP11CP
- FIP10/FIP10P
- P11LTE
- P10LTE
- i12/i12V
- i11/i11V
- P2EXP
- i86V-01/02
- PB01
- i86-01/02/03
- FTA5111
- HB01 & USB433
- FTA5120
- HP200
- BT50
- EHS10
- FPX9102H
- SW7R-Pro
- FRPS
- FACS
- FDC
-
Find by question type
The FTA5111 is a VOIP adapter with one FXS port and one FXO port, which allows you to connect to an analog phone and the PSTN line. Before configuring the adapter, you need to get the SIP registration information from the PBX server.
Step 1. Physical connection
1. Connect FTA5111’s WAN port to the Router/Switch to access the internet, connect one LAN port to a computer with an Ethernet cable, connect the FXS port to the analog phone, connect the FXO port to the PSTN line.
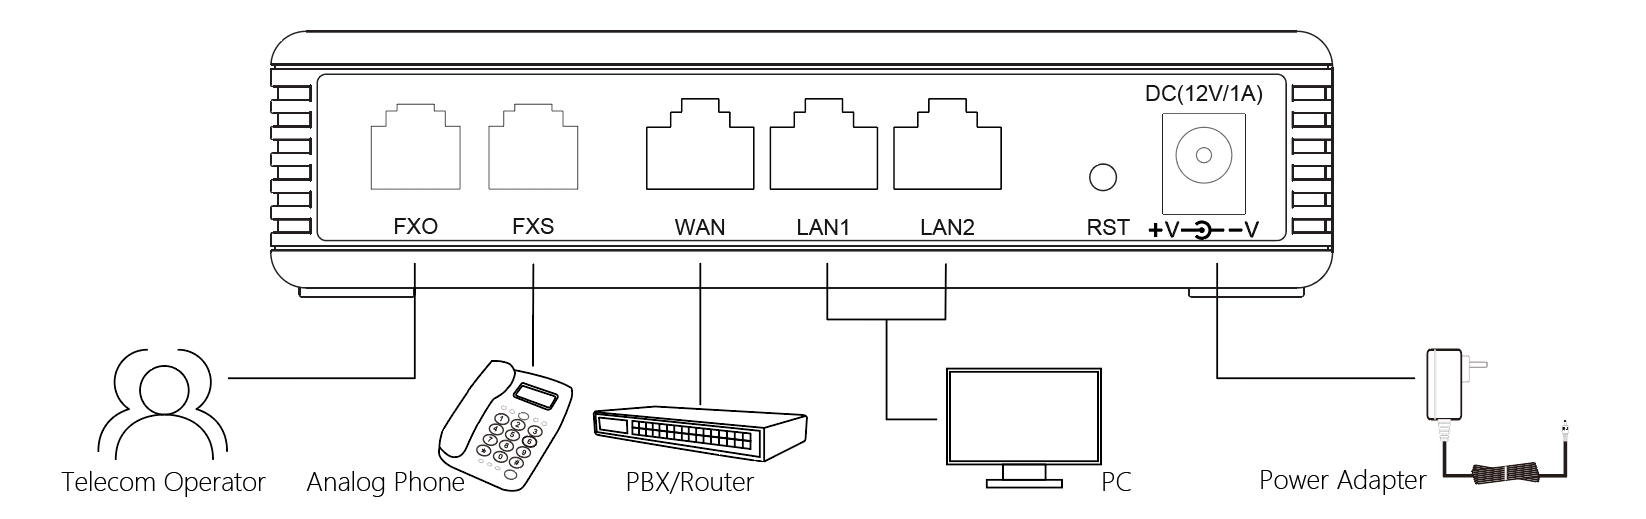
2. When connected properly, the adapter’s Power light and LAN light will be green, the WAN light is blue, the computer will get an IP address(192.168.1.X) from the adapter. When you off-hook the analog phone, you will able to hear the IVR.
Step 2. Login to the adapter’s management page
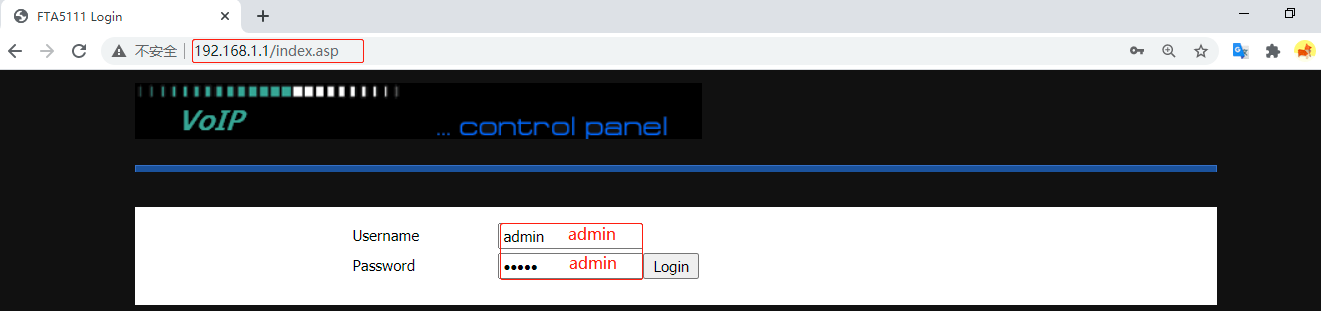
Open a browser and type in the adapter’s LAN IP address 192.168.1.1 in the address bar, a login page displays as below, both the default username and password are admin. Then click Login.
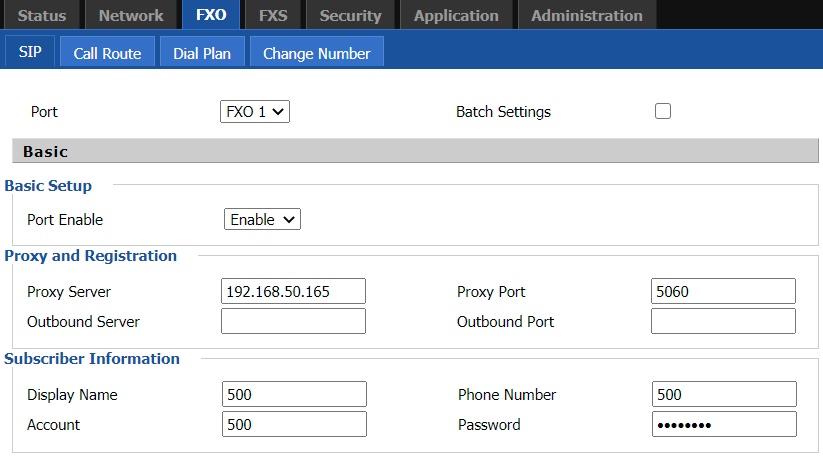
Step 3. Configure the FXO port
1. Go to FXO > SIP, enable the option Port Enable, enter the Proxy Server, Proxy Port, Display Name, Phone Number, Account and Password, then click on Save&Apply on the bottom of the page.

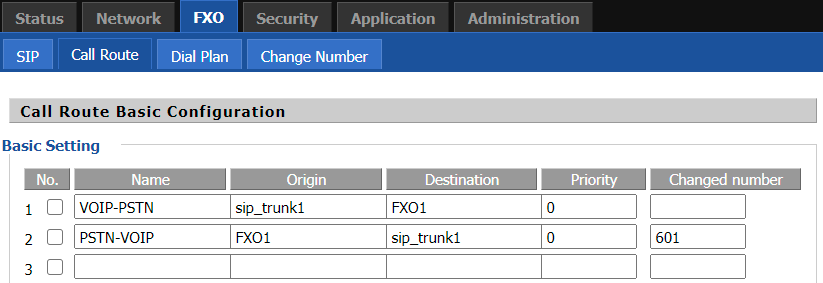
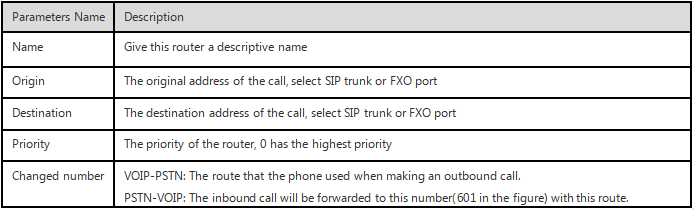
2. Go to FXO > Call Route, set up the call route rule as follows.
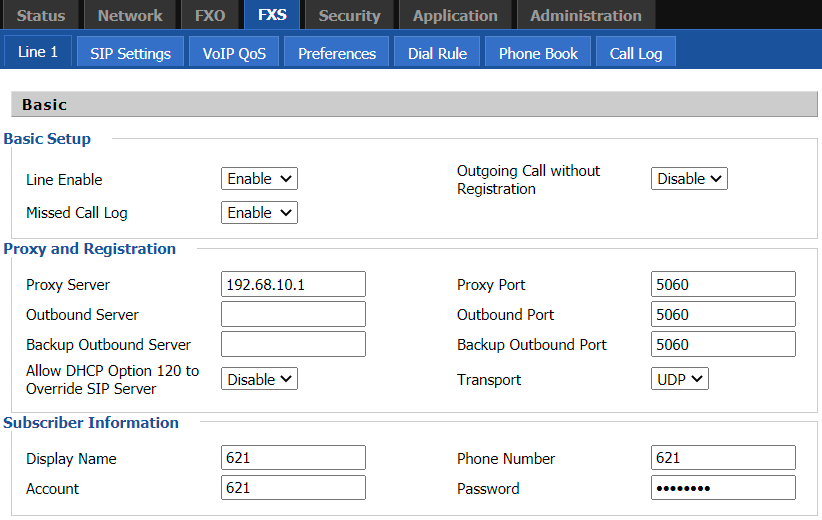
Step 4. Configure the FXS port
Go to FXS > Line 1, enable the option Line Enable, enter the Proxy Server, Proxy Port, Display Name, Phone Number, Account and Password, then click on Save&Apply on the bottom of the page.
When registering to the PBX server successfully, the adapter’s FXS light will be solid green, and the FXS SIP Account Status shows Registered. The analog phone can make outgoing calls or receive incoming calls.
 Back to list


